
A free guide to help you set up Zoom Breakout Rooms for your church or church organisation.
What are Zoom Breakout Rooms?
The Breakout Rooms feature is unique to Zoom, and what makes Zoom the ideal platform for moving church online. It is what transforms an online meeting into genuine fellowship, and means you can have real, in-depth conversations as well as mingling with a host of other people. If you’re active with church online during the lockdown and haven’t discovered them the feature, you don’t know what you’re missing!
The Breakout Rooms feature allows you as the host to allocate a large group of participants into breakout rooms in whatever size groups they want, either by drawing up the room lists yourself, or allowing the software to allocate groups automatically.
Once in the rooms, the participants can see and converse with their group. The host can broadcast messages to the rooms (eg “5 minutes left!”), can move freely between the different rooms, and call everyone back together afterwards. There is a button to recreate the rooms and mix people up in different numerical and name combinations if you’re using them more than once during a meeting.
It opens up a host of possibilities for doing church online.
- Download the guide as a guide PDF or scroll down the page to read the information online.
If you're simply wanting to find out more about Zoom, you may find these two guides helpful:
Using the breakout rooms
Here are just some suggestions:
- Use them during services for people to meet and greet their “nearest neighbours” at the outset; for sharing or discussing during the service; for praying together.
- Use them during Bible studies for people to discuss a passage in depth before coming back together to share their thoughts and discoveries.
- Use them during prayer meetings for people to break into small groups to pray together.
- Use them during Church/Elders’/Committee meetings for in-depth discussions about issues, or to consider alternative options/proposals in depth.
- Use them during a coffee morning or social gathering to simulate people sitting at tables with a few others over a cup of coffee.
- Use the Recreate Rooms feature to move people between tables and meet others.
How to set up Breakout Rooms
The first step is to enable Breakout Rooms in your Meetings settings.
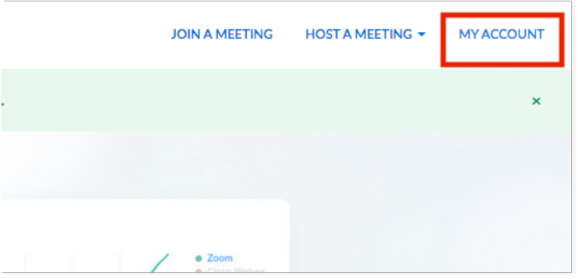
Open your browser and type in “zoom.us” and then select “My Account” in the top right-hand corner:
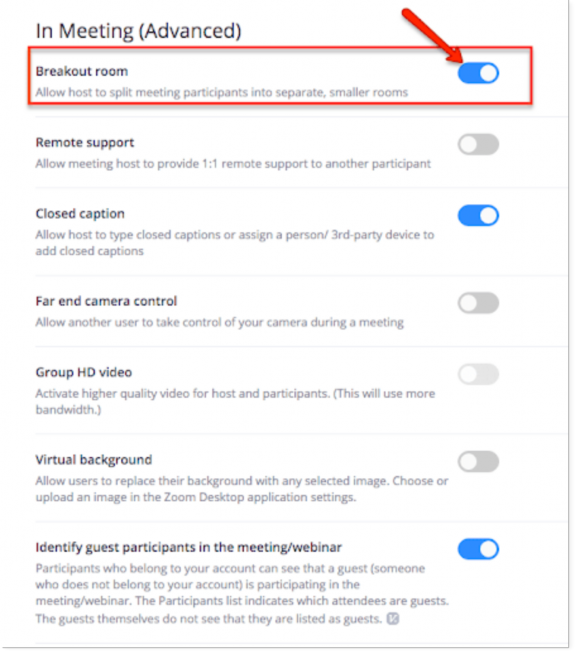
Now open “Settings” and select “In Meeting (Advanced)”:

Then enable the Breakout Rooms:
Start your meeting. The Breakout Rooms button is now visible on your admin toolbar along the bottom of your screen:

Using Breakout Rooms during the meeting
When you are ready to use the Breakout Rooms, click on the Breakout Rooms button. You can do this while the meeting is in progress, because your administrative functions are invisible to the rest of the meeting.
You will be presented with the option to create as many Breakout Rooms as you wish, and whether to assign participants to rooms manually or automatically:
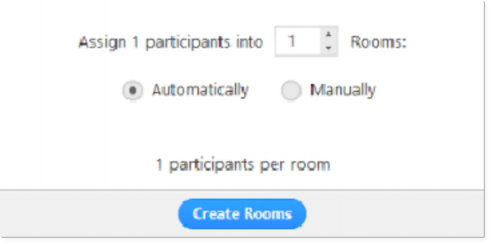
Choose the number of rooms you wish to create on the basis of the number of participants you want in each room:
If you are creating manual groups for a specific purpose (say workshops) it is probably worth renaming them to make it easier to allocate people. Under the manual creation of rooms, you select the members of a particular group from a list of unassigned attendees (cursor over breakout room number – look for ‘assign’ option).
If you are setting up automatic groups that are optional for people to join e.g. a the end of a service, give non-participants time to leave before you create the rooms because otherwise you can have very sparse groups.
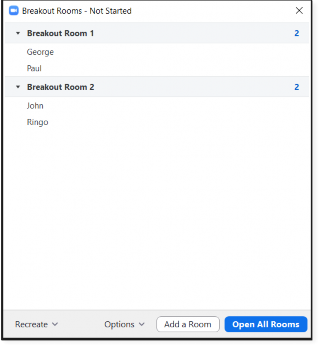
Click “Create Rooms”. You will see a list of the rooms and the participants in each room (see below).
You have the opportunity to make any manual adjustments to the participants in each room by clicking on their names, even if you have created the rooms automatically:

A tip: at this point, you may wish to click the Options button to fine-tune your breakout session. It is, of course, possible to have done this in advance of the meeting, or earlier during the meeting.
Click “Open All Rooms”. Unless you have elected to move participants to the Breakout Rooms automatically, they will receive the invitation to join their preassigned room. Clicking “Join” redirects them to the Breakout Room:
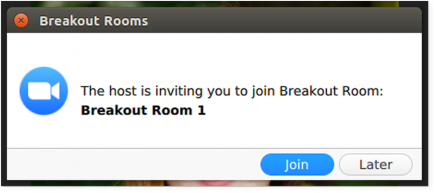
Click “Open All Rooms”. Unless you have elected to move participants to the Breakout Rooms automatically, they will receive the invitation to join their preassigned room. Clicking “Join” redirects them to the Breakout Room:
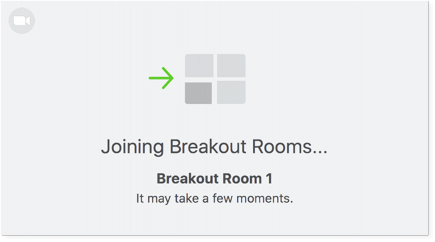
While the rooms are open, you have 2 options as a host and that is to join/visit any of the Breakout Rooms:
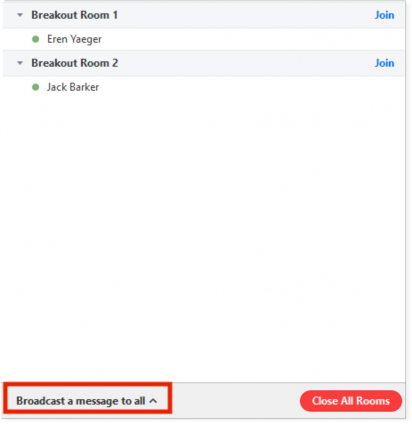
Use “Broadcast a message to all” to inform people of timing etc. Remember, though, that the messages flash up only briefly on the participants’ screen before disappearing.
A minute before you wish to close the rooms, hit “Close All Rooms”. The participants will see a countdown to the room closure (depending on the timing you have set under Options). They have the choice either to return to the main meeting themselves, or be returned automatically to the main meeting once the rooms have closed.
Using the “Recreate All Rooms” feature
You can use this feature to mix things up if you are using the Breakout Rooms more than once and want to vary the participant list or participant numbers.
For example: you may have created rooms of 5-6 participants for a “meet and greet” session at the outset of a service, and may later want to create smaller rooms and vary the participants for discussion, prayer or coffee after the service. This feature allows you to do so.
- Click on the Breakout Rooms button.
- Hit “Recreate All Rooms” button and adjust your room settings.
- Finally hit “Open All Rooms”:
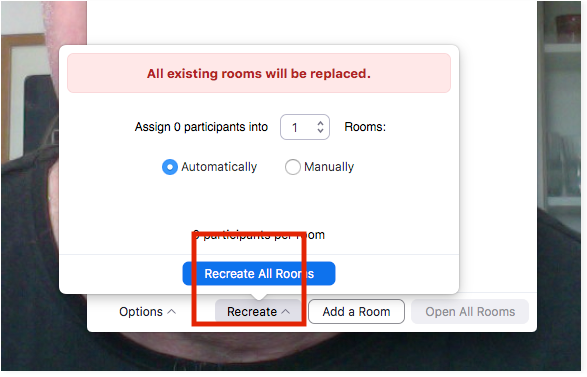
Using the “Add a Room” facility
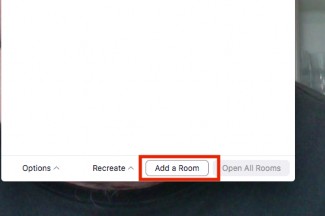
The “Add a Room” facility allows you to add a room to the existing list. You might use this if you have a number of new arrivals to incorporate into your meeting. You can add the room and assign the new arrivals to that room from the Participants list.
It is also a very useful tool if you want to give some individual help. For example, you might want to offer people the opportunity to ask for prayer at the conclusion of the service, while others go to coffee.
To create a prayer room, do the following:
- Set up your Breakout Rooms for coffee (for example, 5-6 participants per room).
- Click on “Add a Room” (see below) and create a new room. Allocate the participant who wants prayer to that room.
- Join the participant in the newly created “prayer room”.
In conclusion
The Breakout Rooms is a powerful feature that creates spaces for fellowship and discussion. Get creative with it!
Useful links
- Setting up a Zoom account
- The Church Media Guys have produced a really useful YouTube clip to help you get started on Zoom
- How to use Facebook, Youtube and Zoom to record acts of worship
- Using Zoom securely - a guide for churches
- Guide to Zoom etiquette
June 2020


